Intro to Android Open Source Platform (AOSP) development
Marko Sopčić
Android Engineer
12 minute read inDevelopment
PublishedJune 25, 2026
Share article
Android platform engineering
Building Android from source sounds like something only Google and phone makers do. It is not. With Docker, a Linux box, and some patience, you can sync the whole Android Open Source Project, build it, boot it in a virtual device, and modify it yourself. This post walks through that path end to end, on a normal desktop.
Why build Android from source
Building Android from source has a reputation: enormous, slow, the kind of thing you assume needs a build farm. We wanted to see how true that is, so we made it an at-home project on a normal desktop. The plan was simple: sync the whole Android Open Source Project (AOSP), build it, boot it in a virtual device, and change something we could see on screen.
AOSP is the full source of the operating system. Building it once is the fastest way to understand how the pieces fit together, and it is the first step toward patching framework behavior or bringing Android up on your own hardware. What follows is the path we took, start to finish.
The catch is that the build is large and the toolchain is particular about its host. AOSP officially requires a 64-bit Linux machine, and to build Android 11 or higher you need Ubuntu 18.04 or later. That requirement is not arbitrary. AOSP ships prebuilt host binaries, including its Clang toolchain, linked against the library versions Ubuntu provides. On a rolling-release distribution the mismatch surfaces quickly. We first tried building on Arch, and the prebuilt tools refused to start because they expected the older ncurses 5 libraries, libncurses.so.5 and libtinfo.so.5, which Arch dropped for ncurses 6 years ago. Compatibility packages exist, but then you are chasing a moving target on every system update.
Docker sidesteps all of it. Rather than bending our host distribution to match what AOSP expects, we pin a known-good Ubuntu 24.04 image and build inside it. The heavy source tree and build cache stay on the host disk, so nothing important is trapped inside the container. The diagram below shows how the pieces sit together.
How the pieces fit: source and ccache live on the host SSD, the container builds AOSP and the Cuttlefish tooling, and the cvd virtual device renders in a browser over WebRTC.
What you need
AOSP is demanding. The official requirements call for a 64-bit x86 Linux machine, a minimum of 64 GB of RAM, and 400 GB of free disk, 250 GB to check out the source and another 150 GB to build it. A fast SSD matters more than almost anything else, because the build touches a huge number of small files.
You also need hardware virtualization. Cuttlefish, the virtual device we boot later, runs through KVM, so the host has to be Linux with an Intel VT-x or AMD-V capable CPU. A Mac or Windows machine running Docker Desktop will not expose KVM, so this is a Linux-host exercise.
Here is what we actually ran it on, so you can calibrate against a real, modest desktop rather than a build farm:
Component
What we used
CPU
AMD Ryzen 5 PRO 4650G (6 cores, 12 threads)
RAM
16 GB DDR4 2133 MHz, plus 32 GB swap
Disk
512 GB SSD
Network
Fast wired connection
Note the RAM. The official minimum is 64 GB, and we ran on 16. The linker in particular is memory hungry, so we added 32 GB of swap and accepted a slower build. Google's reference notes that a 6-core machine with 64 GB of RAM builds AOSP in about 6 hours. On the same core count with a quarter of the RAM, ours took about 8. If you have 32 GB or more of real RAM, you will fare better than we did.
A reproducible build environment with Docker
The whole environment is two files: a Dockerfile and a docker-compose.yml. The idea is simple. The container holds the tools, the host holds the data.
The Dockerfile
Here is the Dockerfile. It starts from Ubuntu 24.04, installs the AOSP build dependencies, adds the toolchain needed to build the Cuttlefish host packages, and drops in Google's repo tool.
The last five packages before the repo download (golang-go through config-package-dev) are there only to build the Cuttlefish host packages later. If you never plan to boot a virtual device, you can drop them. We also copy in a small helper script, setup-cuttlefish.sh, and mark it executable; we use it later to build that tooling once and cache it.
The Compose file
The docker-compose.yml wires the container to the host. The volumes are the important part. The source tree and the ccache directory live on a dedicated SSD at /mnt/aosp, so deleting the container costs nothing.
The privileged: true line surprised us, and it is not only for the virtual device. AOSP builds part of the tree inside nsjail, which needs its own mount, network, PID, and user namespaces. Docker's default profile blocks those calls with Operation not permitted, so the build fails until you run privileged. The same flag exposes /dev/kvm for Cuttlefish, covering both jobs. The nofile limit stops the running device exhausting file descriptors, network_mode: host carries its WebRTC stream to your browser, and /opt/cuttlefish-pkgs caches the built Cuttlefish packages so the one-hour build never repeats.
Creating the host directories
Create the host directories once. The image itself gets built on the first run, in the next step.
Start the container. The first time, build the image and create a named container that persists after you exit. The --build flag means any later Dockerfile change is picked up before the container starts:
docker compose run --build --name aosp-dev-persistent aosp-dev
You land in /aosp, the mounted host directory. On later sessions, reattach to that same container rather than creating a new one:
docker start -ai aosp-dev-persistent
This keeps whatever you install inside the container, such as the Cuttlefish tools we add later, so you build them once instead of every session. The container also remembers its privileged, networking, and device settings, so you do not pass them again. Either way, the source tree and ccache live on the host.
Set your git identity once inside the container, since repo uses it during the checkout:
Now initialize the checkout and sync it. The partial clone flags skip downloading file contents until they are actually needed, which cuts the initial download significantly.
On our wired connection the first sync took about an hour. If it drops out, run the same repo sync again. It picks up where it left off. Because there is so much source to download, the host sometimes rate-limits you and a few repositories fail to sync. That is nothing a repeat repo sync cannot fix.
Building AOSP for Cuttlefish
Load the build helpers, pick a target, and build. We target Cuttlefish on x86-64, which is the virtual device we boot next.
source build/envsetup.sh
lunch aosp_cf_x86_64_phone-trunk_staging-userdebug
m
This is the long one. Our first full build took about 8 hours, which reflects the 16 GB of RAM and the swap thrashing under the linker. With ccache warm and only parts of the tree changing, later builds are far quicker. The cache lives on the host, so it survives container restarts.
When m finishes, the build output sits under /aosp/out, on the host SSD.
Setting up and launching Cuttlefish
Cuttlefish is Google's virtual Android device. The AOSP build produced the device images, but the host side tooling we build separately from the android-cuttlefish repository and install as Debian packages. This is where those extra Dockerfile packages earn their place.
Building those packages takes about an hour, and we do not want to repeat it whenever we rebuild the image or recreate the container. So we build them once, cache the .deb files on the host, and reinstall from the cache after that. That is what setup-cuttlefish.sh, copied into the image earlier, does:
#!/usr/bin/env bash# Build the Cuttlefish host packages once, cache them on a mounted volume, and# install from the cache. The slow build (~1h) runs only when the cached .deb# files are missing, so it survives image rebuilds, new containers, and changes# to the Dockerfile or docker-compose.yml. Installing the cached packages is# fast and is all a fresh container needs.set -euo pipefail
PKG_DIR="${CUTTLEFISH_PKG_DIR:-/opt/cuttlefish-pkgs}"
SRC_DIR=/tmp/android-cuttlefish
mkdir -p "$PKG_DIR"if ! ls"$PKG_DIR"/cuttlefish-base_*.deb >/dev/null 2>&1; thenecho"No cached Cuttlefish packages found. Building (one-time, ~1h)..."rm -rf "$SRC_DIR"
git clone https://github.com/google/android-cuttlefish "$SRC_DIR"
( cd"$SRC_DIR" && tools/buildutils/build_packages.sh )
cp"$SRC_DIR"/cuttlefish-base_*_*64.deb "$SRC_DIR"/cuttlefish-user_*_*64.deb "$PKG_DIR"/
rm -rf "$SRC_DIR"echo"Cached packages in $PKG_DIR."elseecho"Using cached Cuttlefish packages from $PKG_DIR."fi
apt-get install -y "$PKG_DIR"/cuttlefish-base_*_*64.deb "$PKG_DIR"/cuttlefish-user_*_*64.deb
echo"Cuttlefish host tooling installed."
The build runs only when the cached packages are missing, and /opt/cuttlefish-pkgs is a host mount, so the cache survives image rebuilds, container deletion, and edits to the Dockerfile or compose file. Run it inside the container:
setup-cuttlefish.sh
Installing from the local .deb files lets apt pull in the runtime dependencies, such as the networking tools, in one step. On a bare-metal host the install also asks you to join the kvm, cvdnetwork, and render groups and reboot. Our container runs as root with privileged, so we skip both.
With the tooling in place, launch the device:
cd /aosp
source build/envsetup.sh
lunch aosp_cf_x86_64_phone-trunk_staging-userdebug
launch_cvd --daemon
The --daemon flag runs the device in the background, so the shell returns and you can keep working in it. Open https://localhost:8443 in a browser to see the screen over WebRTC, and run adb devices to confirm the device is connected. The build and sync steps below run in this same shell. Stop the device later with stop_cvd.
Making a change in SystemUI
Now the fun part. SystemUI is the package behind the status bar, the notification shade, and Quick Settings. We will reshape the Quick Settings tiles into parallelograms, which is a small, very visible change.
The code lives in frameworks/base/packages/SystemUI. For serious platform work you would explore a tree this size in Android Studio for Platform, the official AOSP IDE that understands the Soong build system and gives code completion across the source. Its setup is a topic of its own, so here we edit the file directly. Recent Android builds render Quick Settings with Jetpack Compose, so the tile shape is defined in Kotlin, in frameworks/base/packages/SystemUI/src/com/android/systemui/qs/panels/ui/compose/infinitegrid/Tile.kt. The snippets below leave out imports for brevity, but the logic is complete. The core of the change is a custom Shape that draws a slanted four point outline:
Then we clip the tile with that shape instead of the default rounded one, and add a little horizontal padding so the content does not run into the slanted edges:
Rebuild just the module rather than the whole tree:
m SystemUI
On our machine a SystemUI rebuild takes about 15 minutes.
Pushing the change to the running device
We do not need to rebuild the full image or relaunch the device. Because we built a userdebug device, we can push the rebuilt files straight into it. SystemUI now lives in the system_ext partition, so that is what we sync.
adb root restarts the device's adb daemon with root, adb remount makes the system partitions writable, and adb sync system_ext copies over the files that changed. After the reboot, pull down Quick Settings and the tiles are parallelograms.
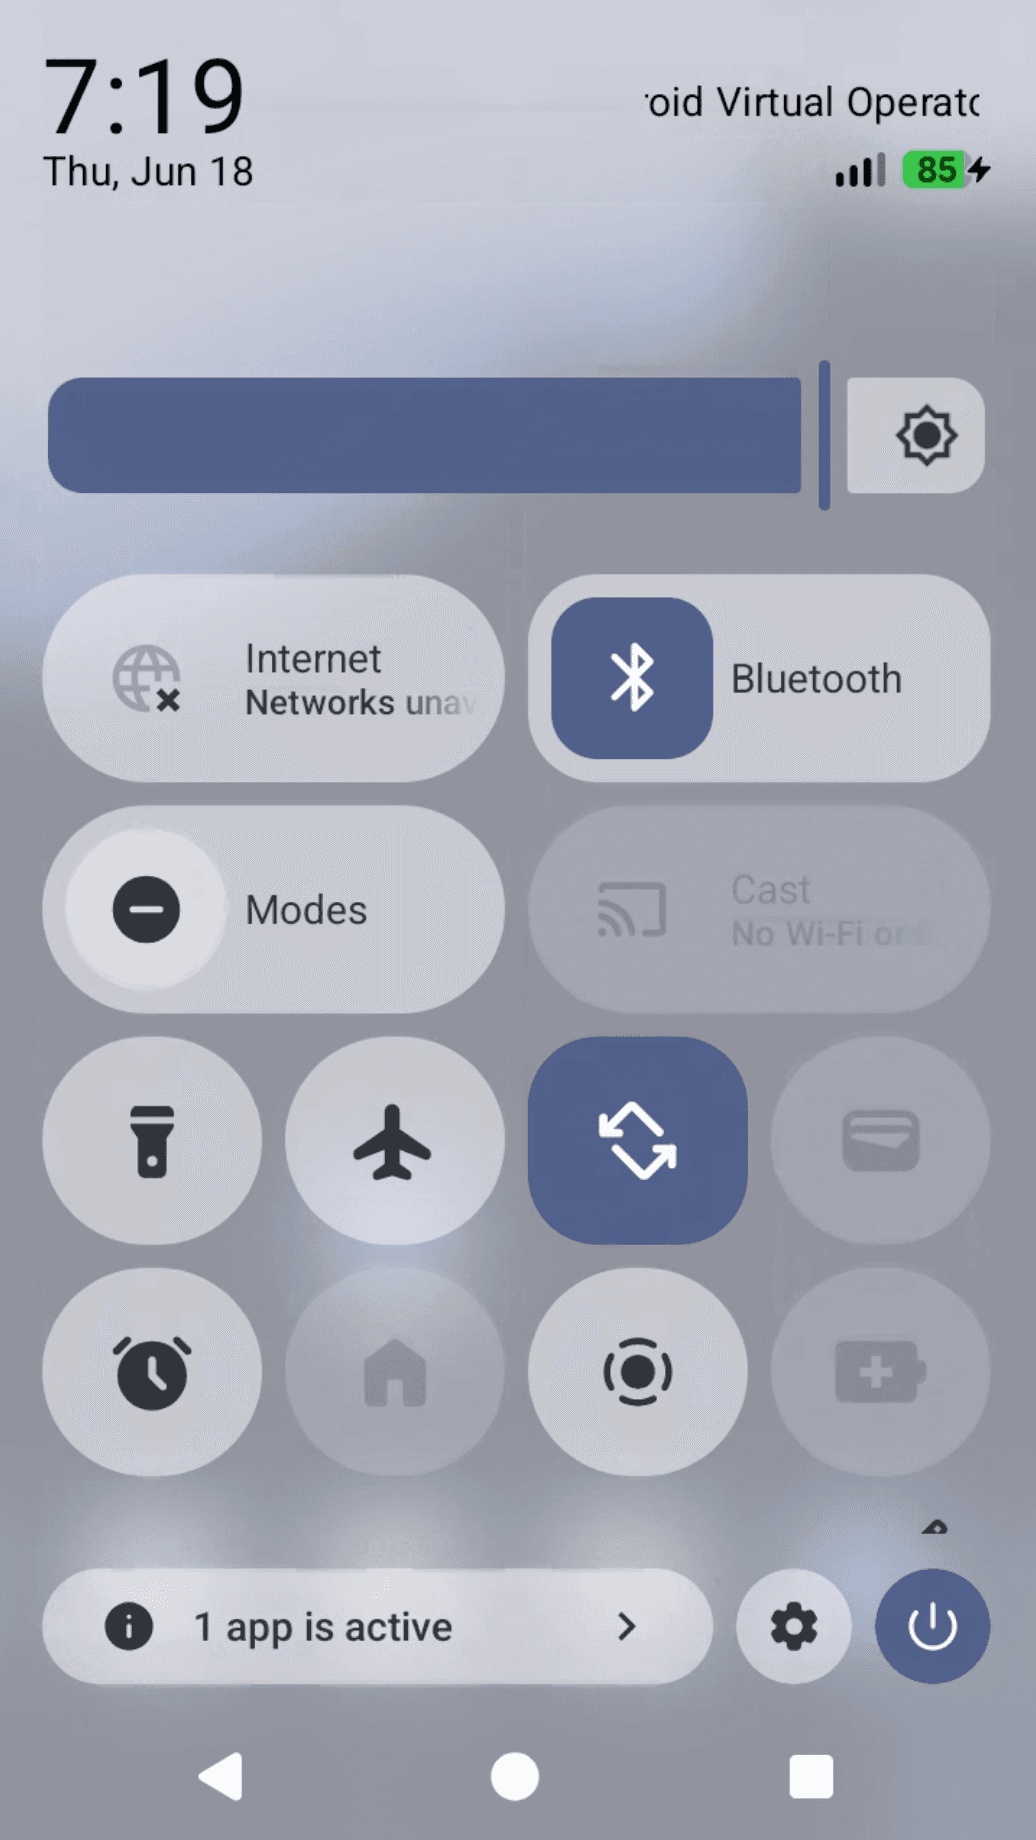
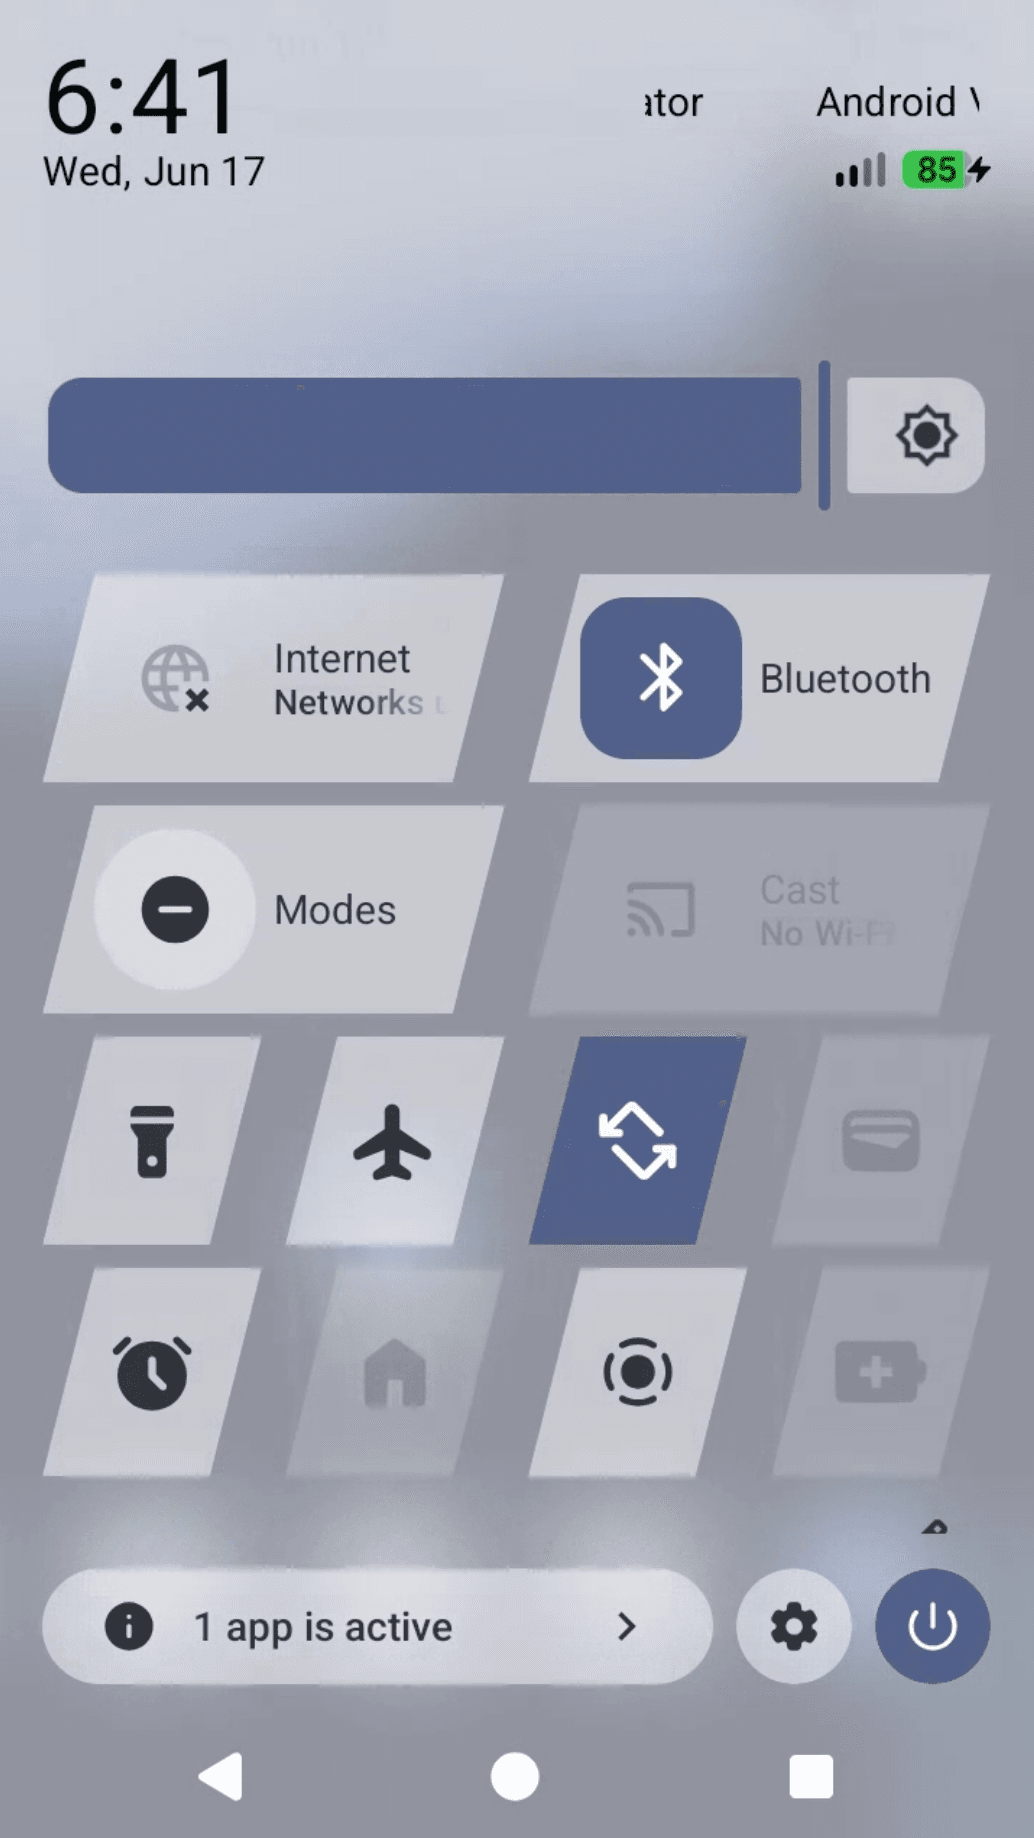
Before
After
Quick Settings before (left) and after (right): the stock rounded tiles, reshaped into parallelograms.
Where to go next
We went from an empty directory to a custom Android system UI running in a virtual device. The build is slow on modest hardware, but nothing here required special equipment beyond a Linux desktop with KVM.
A few directions worth exploring from here:
Patch deeper into the framework. The same edit, build, sync loop works for frameworks/base, settings, and most system modules.
Try a real device. Cuttlefish is pure AOSP, but physical hardware usually needs vendor proprietary binaries to boot fully, so plan for that.
Contribute upstream. AOSP uses Gerrit for review, and the repo upload command sends your local commits there.
Speed things up. More real RAM and a warm ccache are the two changes that pay off most.
The platform stops being a black box once you have built it once. After that, the only limit is which part you want to change next.